The world of trading is a complex labyrinth of numbers, charts, and indicators. It’s a game where the right strategy can make the difference between success and failure. Among the myriad of tools available to traders, the Wada Atar Explosion indicator has emerged as a reliable compass, guiding traders through the volatile seas of the market. This powerful tool, when used correctly, can help traders navigate the market with increased confidence and make profitable decisions consistently. But what exactly is the Wada Atar Explosion indicator? How does it work, and how can traders use it to their advantage? This comprehensive guide aims to answer these questions and more, providing traders with the knowledge they need to master this powerful tool.
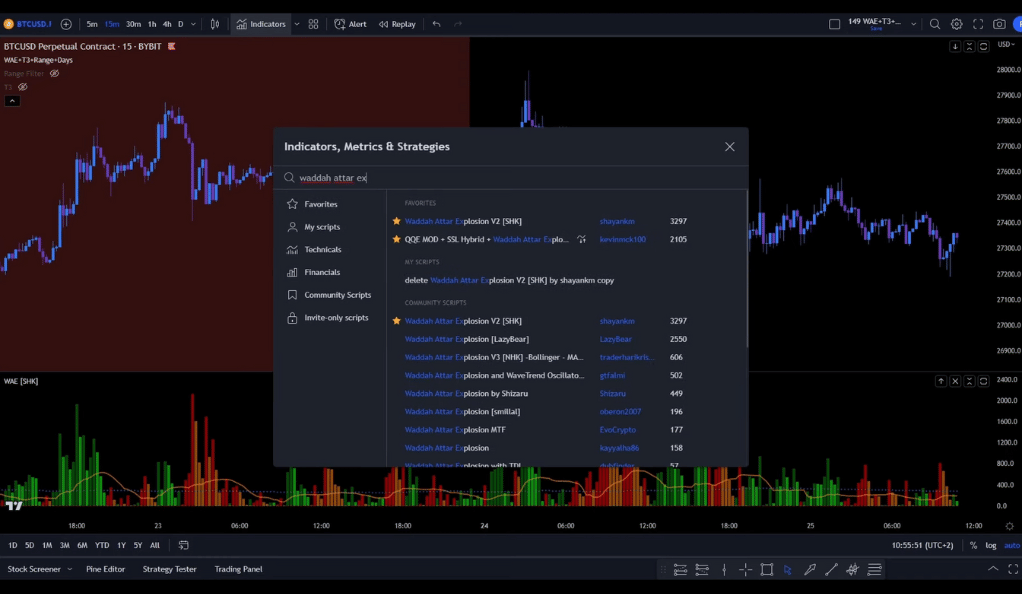
Understanding the Wada Atar Explosion Indicator
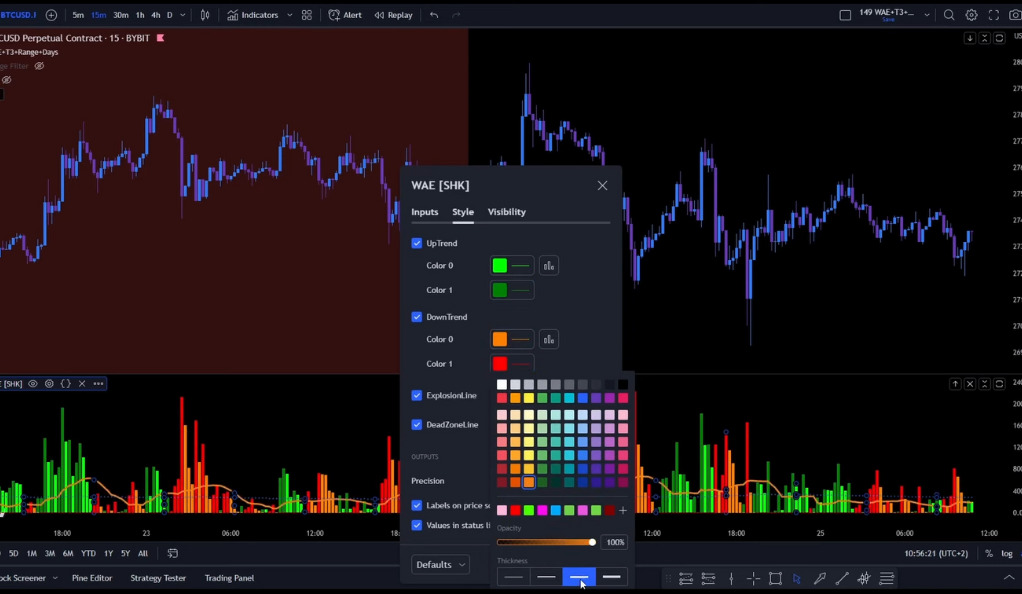
The Wada Atar Explosion indicator is a key tool for confirming entry signals for trading. It’s like a traffic light system guiding you through the bustling city of the market. For a long entry signal, the Wada Atar histogram needs to be green, signaling it’s safe to proceed. Additionally, the explosion line, colored orange, needs to be above the dead zone line, which is blue with crosses. This is akin to seeing a green light at a traffic signal – it’s time to go!
On the other hand, for a short entry signal, the histogram needs to be red or orange, signaling caution. The explosion line also needs to be above the dead zone line. This is like seeing a yellow or red light at a traffic signal, telling you to slow down and proceed with caution. Understanding these signals and how they relate to market movements is crucial for traders looking to leverage the Wada Atar Explosion indicator.
The Role of the Range Filter
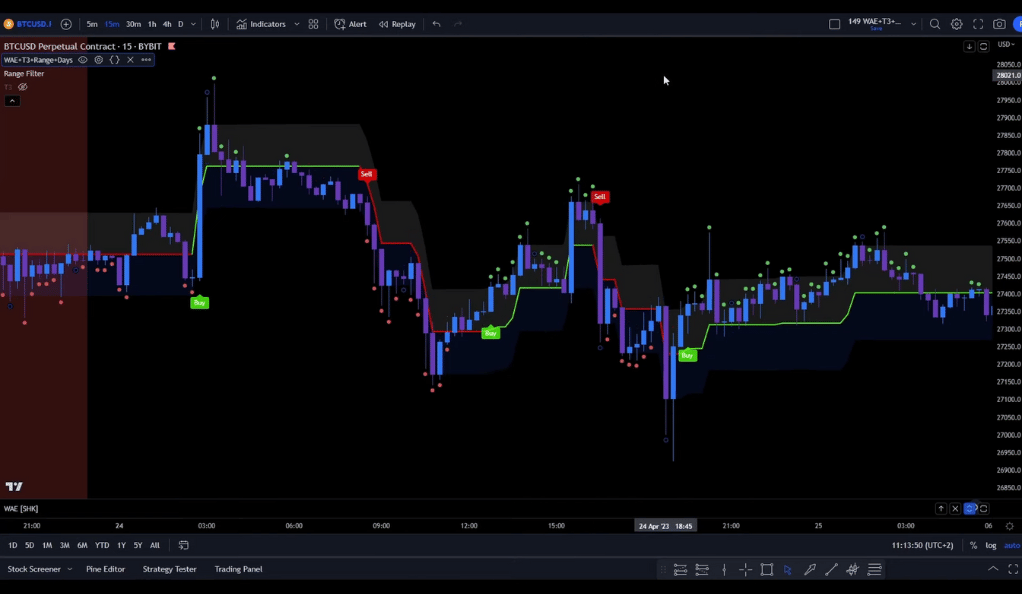
The range filter is an invaluable tool in a trader’s arsenal, working hand in hand with the Wada Atar Explosion indicator to provide additional confirmation for entry signals. It’s like a trusty sidekick, always there to back you up when you’re about to make a crucial decision. For a long entry, the line of the range filter needs to be green, and the price action needs to be above this green line. This is akin to having a friend confirm that the party you’re about to enter is indeed happening and it’s time to join the fun. The range filter, in this case, acts as a green light, signaling traders that it’s safe to proceed with the long entry.
On the flip side, for a short entry, the line needs to be red, and the price action needs to be below the line. This is like your friend telling you the party is over, and it’s time to leave. The red line of the range filter serves as a warning sign, indicating that the market conditions are not favorable for a long entry and that it might be time to consider a short entry. By understanding and utilizing the range filter, traders can make more informed decisions, reducing the risk of entering or exiting trades at the wrong time. It’s like having a second pair of eyes, always keeping a lookout for you, ensuring you make the best possible trading decisions.
The Importance of the T3 Line
The T3 line is a vital tool in the trading toolbox, acting as a boundary marker that helps traders understand where they should and shouldn’t go. It’s like a boundary line in a game of football, clearly demarcating the playing field and helping you understand where you should and shouldn’t go. In the context of trading, you should only look for long entries when the price action is above the T3 line. This is akin to being on the offensive in a game, pushing forward because the conditions are in your favor.
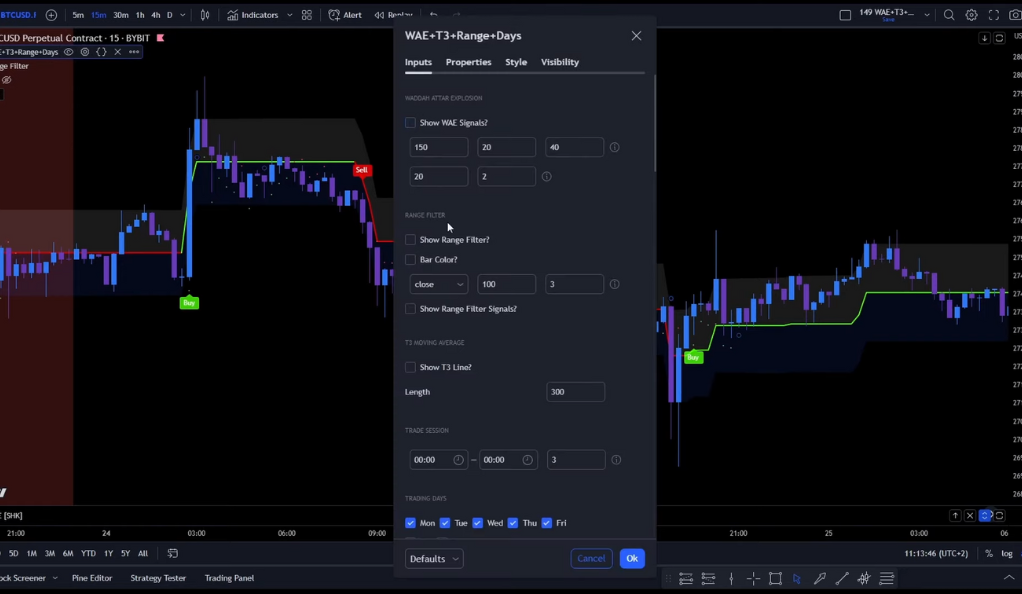
In contrast, traders should only look for short entries when the price action is below the T3 line. This is similar to being on the defensive in a game, pulling back and protecting your position because the conditions are not in your favor. Understanding the T3 line and how it interacts with price action can provide traders with valuable insights into market trends. It can help identify potential entry and exit points, making it a valuable tool for any trader looking to maximize their profits and minimize their losses.
In the ever-changing landscape of the market, the T3 line serves as a constant, a reliable reference point that traders can use to navigate the market. It’s like a lighthouse guiding ships through a stormy sea, providing a beacon of light amidst the volatility of the market. By understanding the importance of the T3 line and how to use it effectively, traders can enhance their trading strategy, making more informed decisions that can lead to successful trades.
Trade Sessions and Trading Days
Trade sessions and trading days can be used to filter out trades during certain times. For example, some strategies may not perform well on weekends for crypto trading, so the option to not open trades on Saturday or Sunday can be useful. It’s like knowing when the store is open and when it’s closed, so you don’t waste your time.
Understanding the nuances of trade sessions and trading days can help traders optimize their strategies and improve their performance. By knowing when to trade and when not to trade, traders can avoid unnecessary losses and maximize their profits.
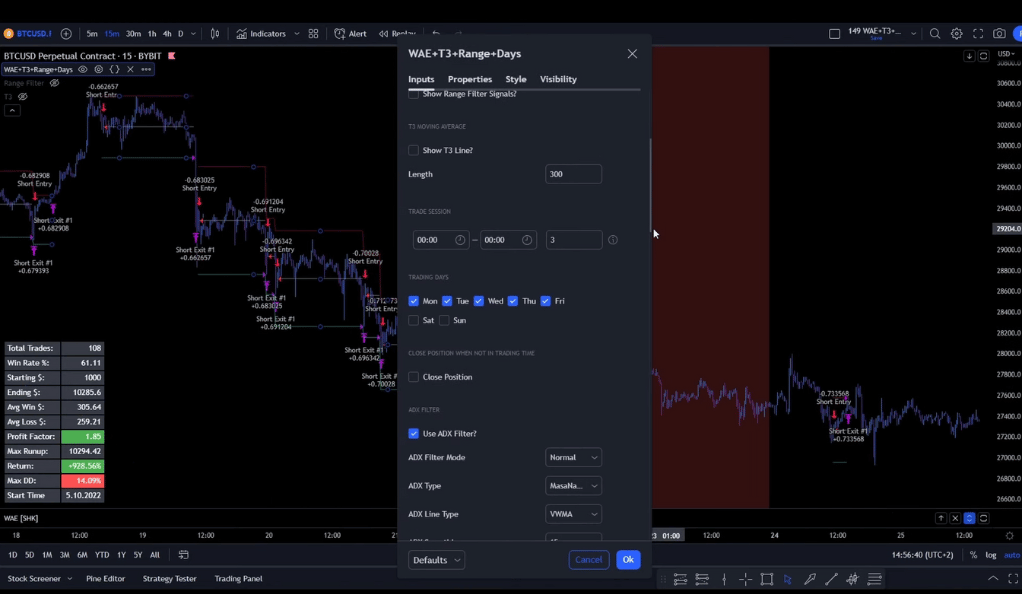
The Power of the ADX Filter
The ADX filter is a potent tool in a trader’s arsenal, helping to filter out bad trades and increase the potential for profitable ones. It’s like a sieve, separating the wheat from the chaff, allowing only the most promising trades to pass through. A strict filter mode can decrease the total number of trades but increase the win rate and profit factor. It’s like having a strict teacher who only accepts the best work, ensuring you always strive for excellence. The ADX filter works by measuring the strength of a trend, providing an indication of whether a market is trending or ranging.
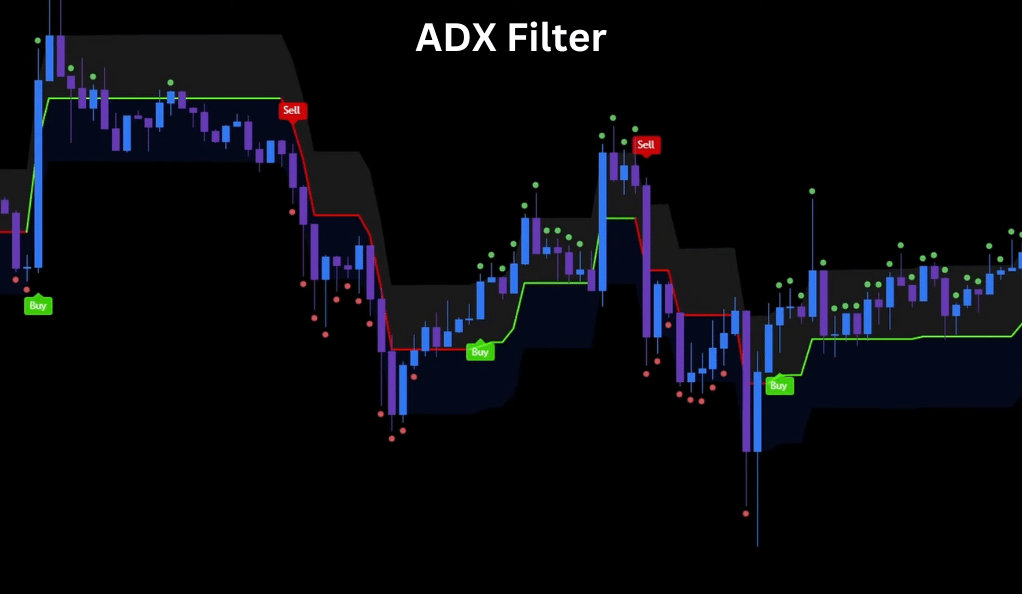
Understanding how to use the ADX filter can significantly enhance a trader’s ability to make profitable decisions. For instance, during periods of low volatility, when the market is ranging, the ADX filter can help traders avoid entering trades, reducing the risk of losses. Conversely, during periods of high volatility, when the market is trending, the ADX filter can signal traders to enter trades, increasing the potential for profit. It’s like having a weather forecast, helping you plan your activities based on the expected conditions.
The ADX filter is not just a tool for filtering trades; it’s a tool for enhancing your overall trading strategy. By understanding how to use the ADX filter effectively, traders can optimize their trading strategy, focusing on high-potential trades and avoiding less promising ones. It’s like having a roadmap, guiding you towards your destination while helping you avoid potential roadblocks along the way. With the power of the ADX filter, traders can navigate the market with increased confidence, making more informed decisions that lead to profitable trades.
The Importance of Optimizing All Settings
Optimizing all settings in your trading strategy is akin to fine-tuning a musical instrument. Just as a well-tuned instrument can produce beautiful music, a well-optimized trading strategy can lead to profitable trades. Each setting in your trading strategy, from the indicators you use to the parameters you set for them, plays a crucial role in determining the effectiveness of your strategy. It’s like adjusting the sails of a ship to catch the wind just right; with the correct settings, your trading strategy can navigate the market effectively, leading you towards your desired trading goals.
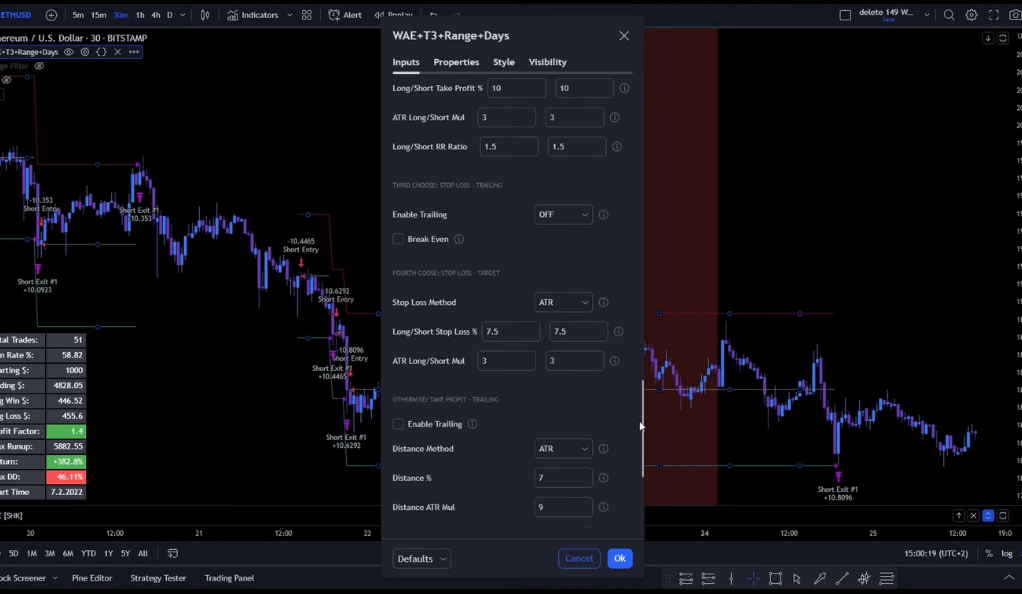
However, it’s important to remember that there’s no one-size-fits-all when it comes to settings. What works well for one market or timeframe might not work as well for another. Therefore, it’s crucial to test and optimize your settings for each market and timeframe you’re trading in. This process of optimization is like tailoring a suit; it ensures that your trading strategy fits the market perfectly, maximizing your potential for profit. By taking the time to optimize all settings, traders can enhance the effectiveness of their trading strategy, leading to more consistent and profitable trades.
Exploring Different Markets and Timeframes
Diversifying your trading strategy by exploring different markets and timeframes is a smart move for any trader. It’s like a traveler visiting new cities and countries, each with its unique culture and experiences. Different markets and timeframes can offer various opportunities, and what works well in one might not be as effective in another. Therefore, it’s crucial to test your strategy across different markets and timeframes, adjusting and optimizing as necessary. This exploration can lead to more robust trading strategies, capable of navigating the diverse landscapes of various markets and timeframes.
Conclusion
Mastering the Wada Atar Explosion indicator and the other tools mentioned can significantly improve your trading strategy. It’s like learning to play a musical instrument – it may seem complex at first, but with practice, you’ll be creating beautiful music (or in this case, profitable trades) in no time. So why wait? Start exploring these tools today and take your trading game to the next level. Remember, the key to success in trading lies not just in having the right tools, but in understanding how to use them effectively.
Ainu Token aims to offer impartial and trustworthy information on cryptocurrency, finance, trading, and shares. However, we don't provide financial advice and recommend users to conduct their own studies and thorough checks.
Comments (No)