Trading is a world filled with numerous strategies and concepts, but none are as fundamental as the concept of supply and demand. Understanding this principle is like holding the key to a treasure chest of trading wisdom. But what exactly are supply and demand in trading? How do you draw zones and validate them? And what secret tricks can you use to improve your zones? Let’s dive in and unravel these mysteries.
Understanding Supply and Demand in Trading
In the world of trading, supply and demand are fundamental concepts that drive market prices. They form the backbone of market economy theory and are pivotal in shaping trading strategies.
Supply, in trading terms, refers to the quantity of a particular commodity, security, or currency that market participants are willing to sell at various prices. When we talk about an area of ‘supply’ in trading, we’re referring to a price level at which there was a significant amount of selling activity. This aggressive selling creates a downward pressure on prices, leading to a bearish market sentiment.
On the other hand, demand refers to the quantity of a particular commodity, security, or currency that market participants are willing to buy at various prices. A ‘demand’ zone in trading is a price level where there was substantial buying activity. This aggressive buying creates an upward pressure on prices, leading to a bullish market sentiment.
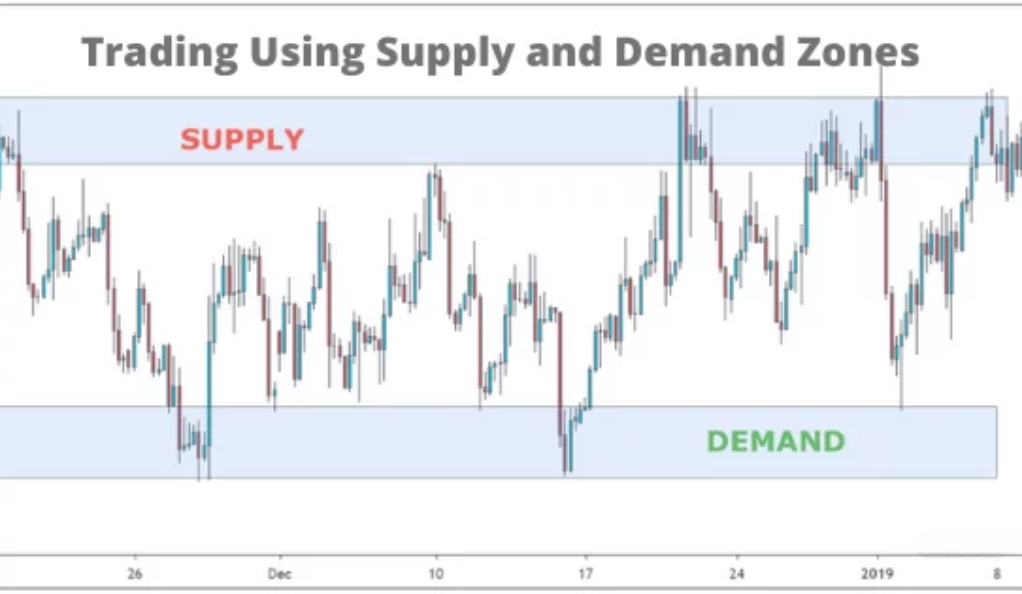
The key to identifying supply and demand zones is the aggressiveness of buying or selling. For a zone to be considered a supply or demand zone, the price movement must be vigorous and decisive. It’s this aggressive price movement that indicates strong selling or buying interest, respectively.
Understanding supply and demand in trading is not just about identifying these zones, but also about understanding the market psychology that creates them. It’s about recognizing the balance between sellers and buyers, and how shifts in this balance can create profitable trading opportunities. This understanding forms the basis of many trading strategies and is crucial for successful trading.
The Art of Drawing Zones
Drawing zones in trading is an essential skill that can significantly impact your trading strategy. These zones, often referred to as supply and demand zones, represent areas on the price chart where significant buying or selling activity has occurred. Understanding how to accurately draw these zones is akin to an artist mastering their brush strokes – it requires practice, precision, and a keen understanding of the underlying principles.
When drawing a demand zone, the process begins by identifying the red candlestick that precedes a strong upward price movement. This upward movement signifies aggressive buying activity, indicating a high demand for the asset. The demand zone is then drawn from the low to the high of the identified red candlestick. This zone essentially encapsulates the price range where buyers have previously stepped in with force, potentially influencing future price movements.
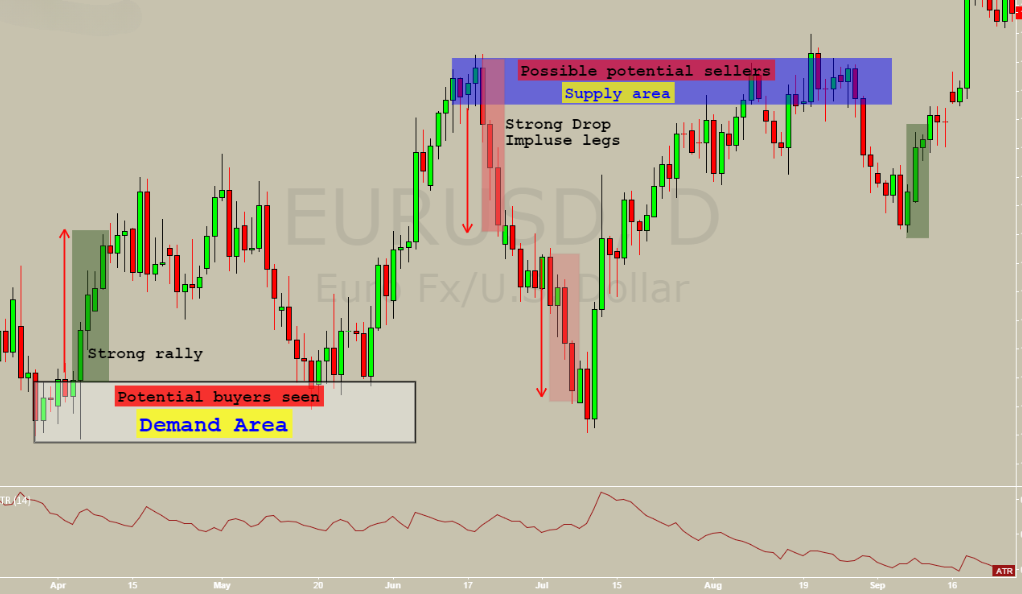
Conversely, to draw a supply zone, you need to spot the green candlestick that comes just before a sharp downward price movement. This downward movement is indicative of aggressive selling, suggesting a high supply of the asset. The supply zone is then drawn from the low to the high of the green candlestick, marking the area where sellers have previously dominated.
Drawing zones is not just about marking areas on a chart; it’s about understanding the market dynamics that led to the creation of these zones. It’s about recognizing where the power balance between buyers and sellers has shifted dramatically, leading to significant price movements. Mastering the art of drawing zones is a crucial step towards developing a robust and effective trading strategy.
Validating Your Zones
In the world of trading, not all zones are created equal. Some zones are merely transient price levels, while others are significant areas of supply and demand that can influence future price movements. This is where the process of validating your zones comes into play.
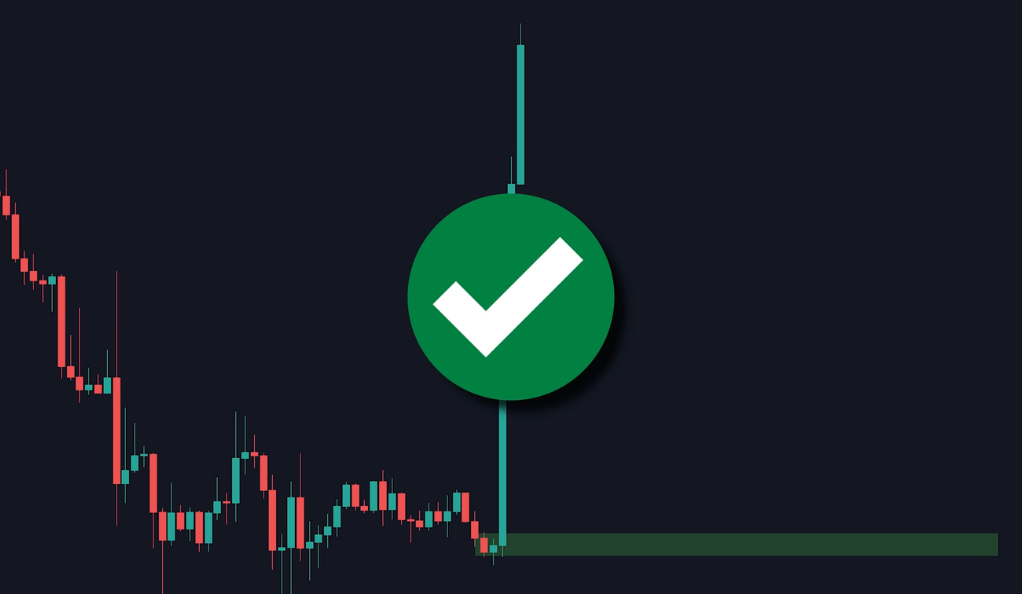
Validating zones is akin to quality control in manufacturing. It’s about ensuring that the zones you’ve identified are indeed significant and likely to influence future price movements. A valid zone is one that has experienced a break of structure, a technical term that refers to a significant change in the price pattern.
For instance, if you’ve identified a potential supply zone following a period of aggressive selling, you need to see if the price breaks the structure. This means that the price should move significantly below the low of the supply zone, indicating that sellers have taken control and that the supply zone is indeed a significant level.
If the price doesn’t break the structure, the zone is not validated. In this case, the zone is likely just a transient price level and not a significant area of supply. Trading off such zones can be risky as they may not hold up under future price movements.
In essence, validating your zones is about confirming their significance. It’s about ensuring that you’re not just seeing patterns in the noise, but identifying significant areas of supply and demand that can provide profitable trading opportunities. It’s a crucial step in any supply and demand trading strategy and one that can significantly improve your trading results.
Entering and Exiting Trades: The Strategy
Once you’ve drawn and validated your zones, it’s time to strategize your entry and exit points. Enter as soon as the price comes back down to the zone. Set your stop loss right below (for a demand zone) or above (for a supply zone) the zone. Your take profit should be set at the high (for demand zone) or low (for supply zone) of the move. It’s like playing a game of chess, where every move is calculated and strategic.
Secret Tricks to Improve Your Zones
Improving your supply and demand zones involves a couple of secret tricks that can significantly enhance the effectiveness of your trading strategy. These tricks are like the secret sauce that can turn a good trading strategy into a great one.
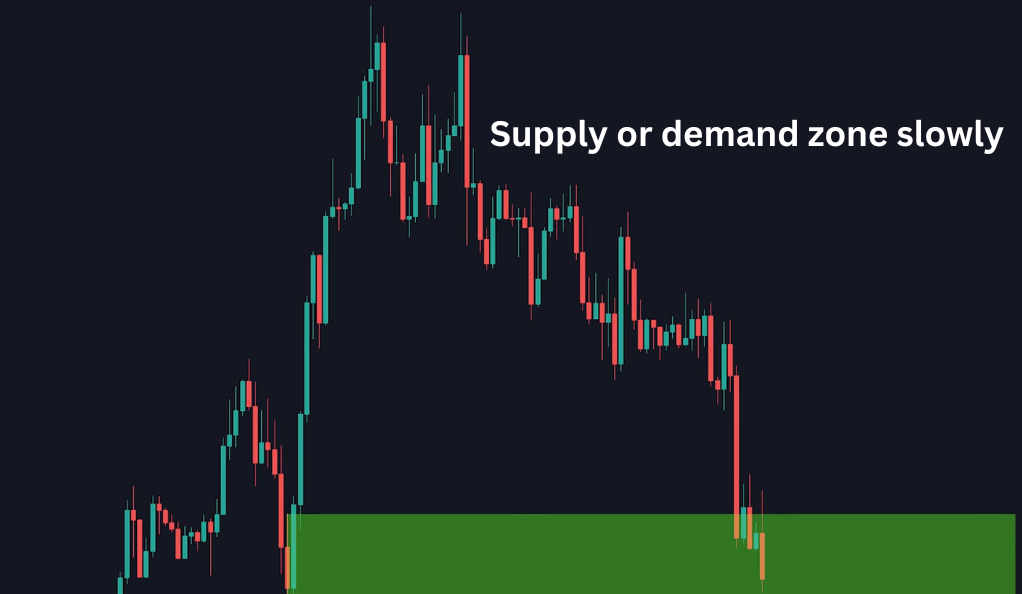
The first trick is about the speed at which the price approaches your zone. Ideally, you want the price to approach your supply or demand zone slowly. A slow approach often indicates a lack of strong market sentiment in the opposite direction, increasing the likelihood that the price will react at your zone. If the price returns to your zone in a very aggressive and sharp manner, it may indicate strong momentum that could push through your zone. In such cases, it’s often better to hold off on entering the trade.
The second trick involves looking for a fair value gap at the beginning of the move. A fair value gap occurs when the price jumps up or down quickly, leaving a gap in the price chart. This gap represents an imbalance between supply and demand, with the price moving too fast for the market to fill the gap. If you see a fair value gap connected to the candle that started the move into your zone, it’s a good sign. It indicates a strong imbalance in supply and demand at your zone, increasing the likelihood of a price reaction.

These tricks are not foolproof, and they should be used in conjunction with a solid understanding of supply and demand trading. However, when used correctly, they can significantly improve the effectiveness of your zones and enhance your trading results.
The Power of Trading Tools
In the dynamic world of trading, having the right tools at your disposal can be the difference between success and failure. Trading tools are like navigational aids that guide traders through the complex and often turbulent financial markets.
One such tool mentioned in the discourse is a private indicator that automatically displays all break-up structures and fair value gaps. Break-up structures are significant price levels where the price pattern has changed, indicating a potential shift in supply and demand. Fair value gaps, on the other hand, are price gaps that indicate a strong imbalance in supply and demand.

This private indicator acts as a powerful assistant, automating the process of identifying these critical market structures. It saves traders the time and effort of manually scanning price charts for these structures, allowing them to focus on other aspects of their trading strategy.
Moreover, by automating this process, the tool also helps to reduce the risk of human error. It ensures that traders don’t miss any significant break-up structures or fair value gaps, and it prevents them from mistakenly identifying insignificant price levels as significant market structures.
In essence, trading tools like this private indicator empower traders to navigate the markets more effectively and efficiently. They provide valuable insights into market dynamics, help to streamline the trading process, and ultimately, can significantly enhance trading performance.
Community Interaction: The Final Piece of the Puzzle
The speaker encourages joining their Discord for more trading tips and strategies, and to interact with other like-minded traders. It’s a great place to learn, share, and grow as a trader. After all, trading is not just about numbers and charts; it’s also about community and collaboration.
Conclusion
Mastering the art of supply and demand in trading is not an overnight process. It requires understanding, practice, and a keen eye for detail. But with the right strategies, tools, and community, you can navigate the trading waters with confidence and precision. So, are you ready to embark on this exciting journey?
Ainu Token aims to offer impartial and trustworthy information on cryptocurrency, finance, trading, and shares. However, we don't provide financial advice and recommend users to conduct their own studies and thorough checks.
Comments (No)